Kids’ parties can be more fun than parties for grown-ups. The planning is less stressful and you can let your inner child out. You can even have your kids participate in the preparations!
Are you hosting a kids’ party soon? Here’s a cute DIY bubble gum machine idea that will add color to your set-up!
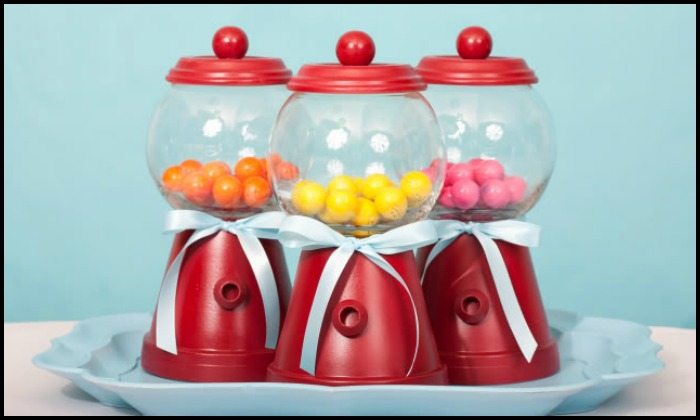
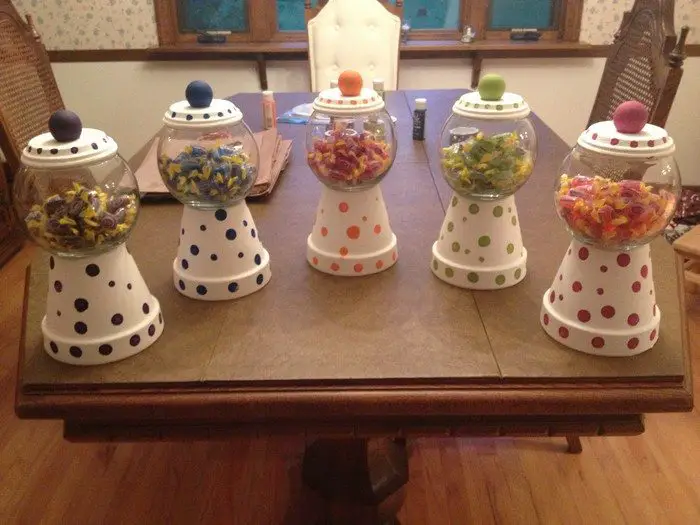
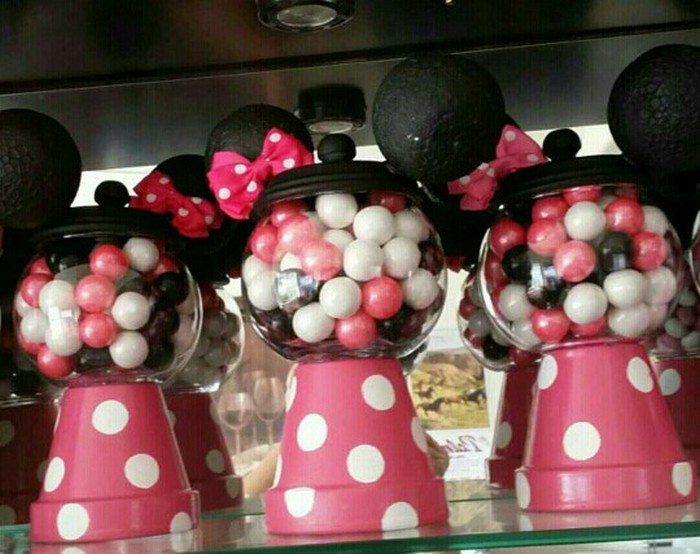
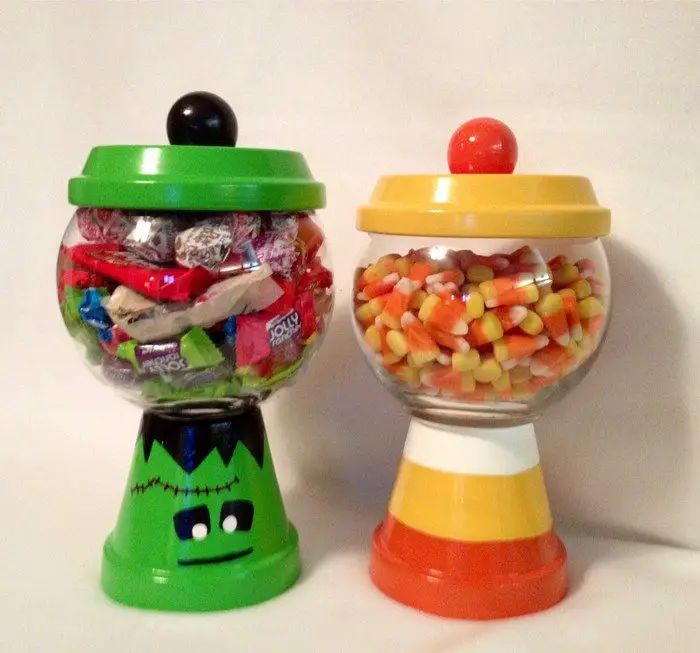
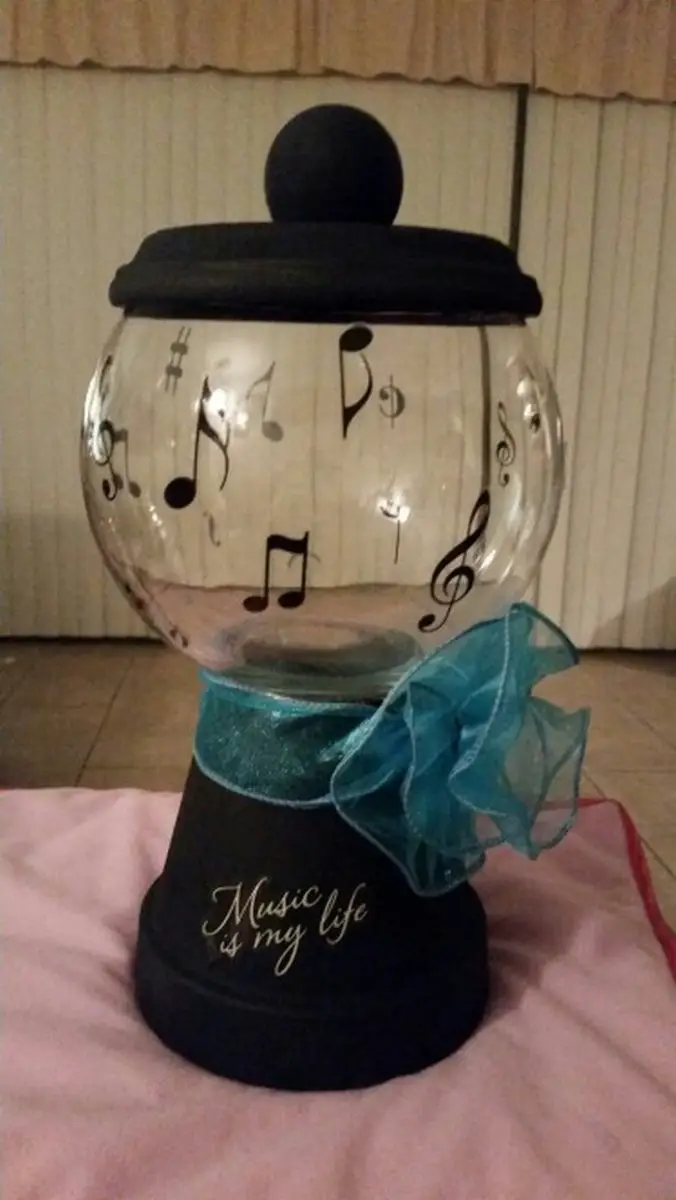
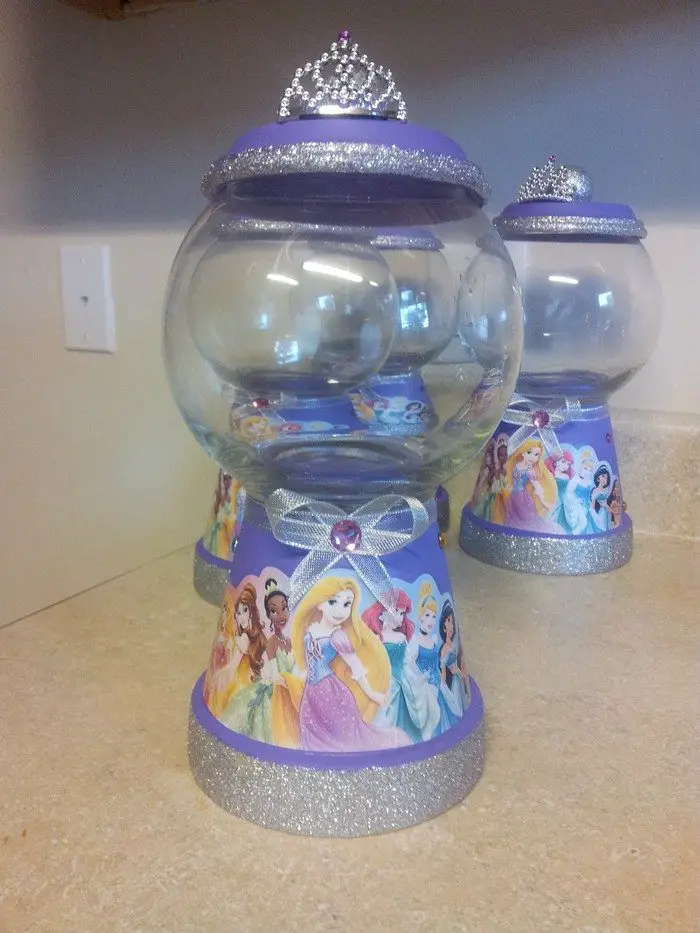
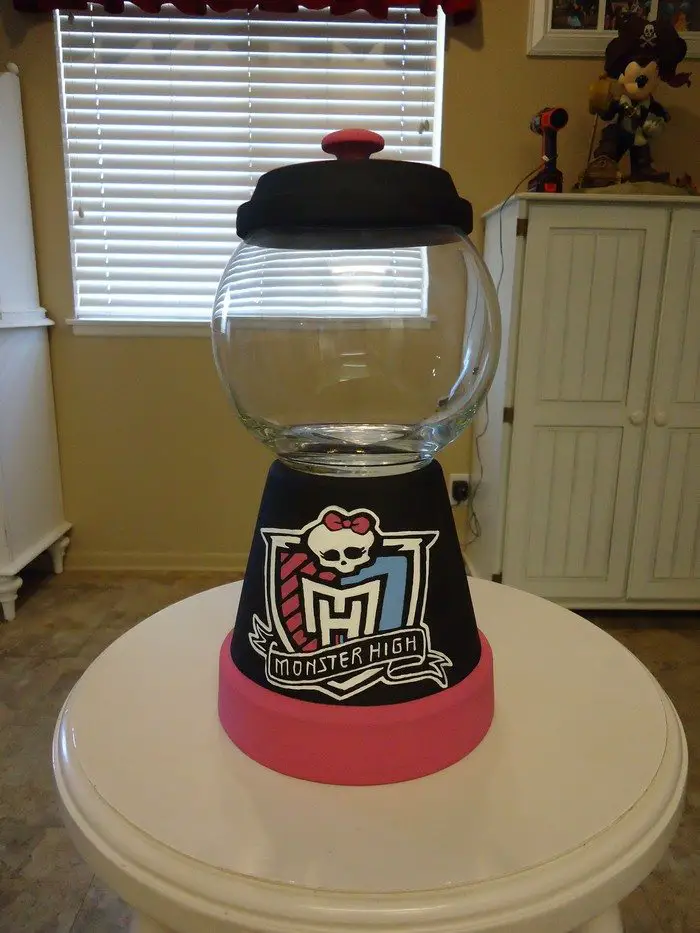
They are not real gumball machines, but it’s definitely a nice way to sort and display candy treats on the table!
This craft project is simple and the materials are inexpensive items that can easily be found in craft and home improvement stores.
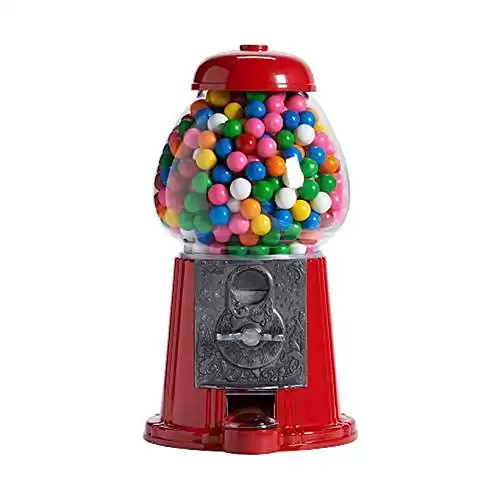
Accepts pennies, nickles, dimes, and quarters or, set it for plain dispensing.
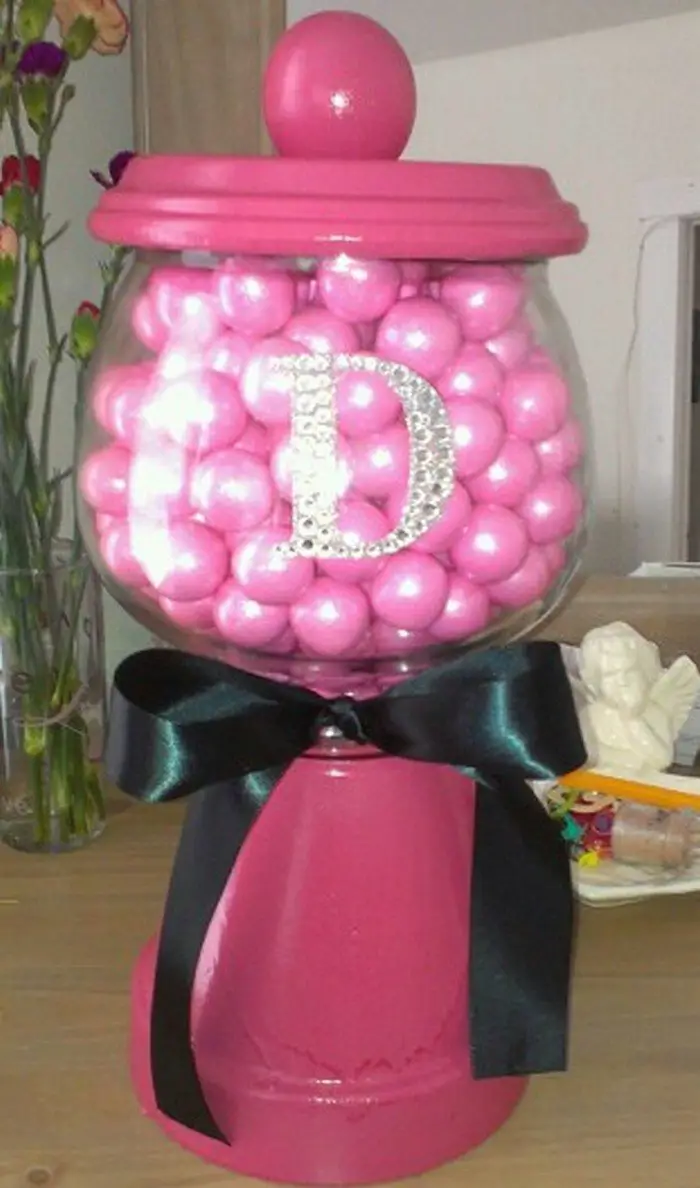
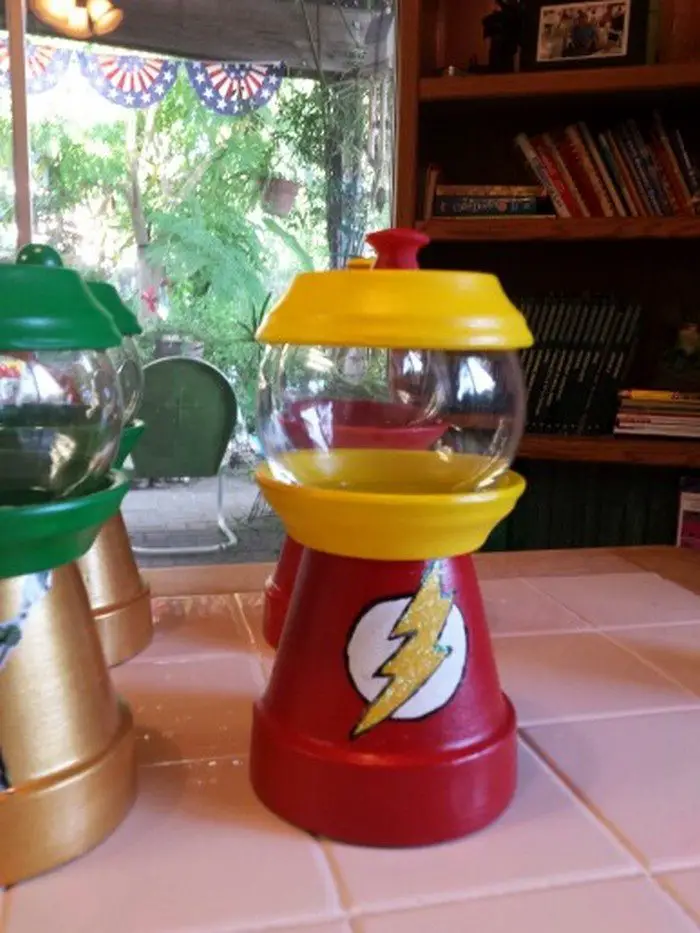
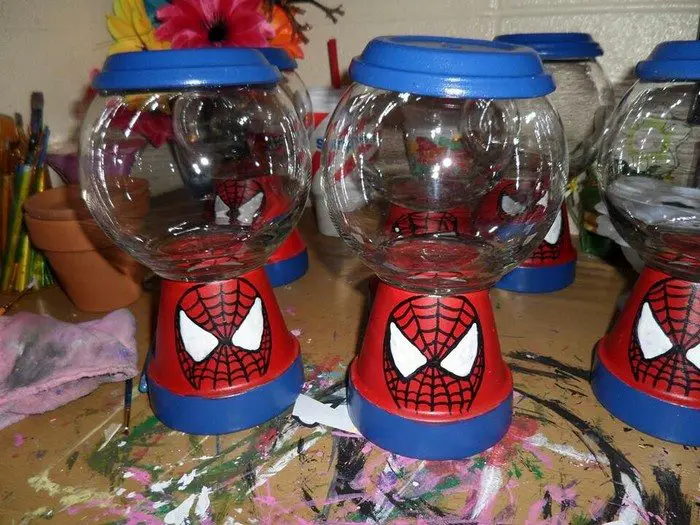
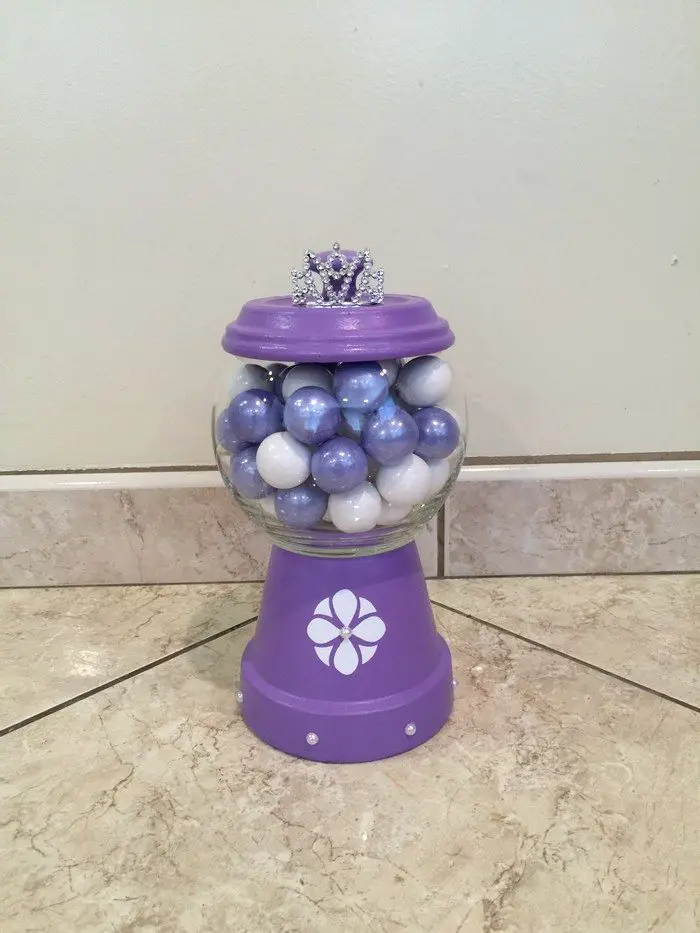
You can also make a DIY gumball machine as a gift for someone who loves sweets. Personalize it, just like the ones shown in our album below, to make it even more special!
Do you know someone who will love this idea? :)
Contents
- 1 Materials and Tools Required
- 2 Step-by-Step Construction Guide
- 3 Customizing Your Bubble Gum Machine
- 4 Maintenance and Care
- 5 FAQ on Building Your DIY Bubble Gum Machine
- 5.1 How difficult is it to make a DIY bubble gum machine?
- 5.2 Can I use any type of paint for my bubble gum machine?
- 5.3 How often should I clean my DIY bubble gum machine?
- 5.4 Is it safe to put a DIY bubble gum machine in a child’s room?
- 5.5 What kind of maintenance does the dispensing mechanism need?
- 5.6 Can I use materials other than wood for the base and dowel?
- 5.7 Where can I find the materials to build a bubble gum machine?
- 6 Conclusion
Materials and Tools Required
To build your DIY bubble gum machine, you’ll need specific materials and tools. This section lists everything required to ensure your project is a success.
Materials:
- Clear glass or plastic globe – This serves as the main body to hold the bubble gum.
- Wooden base – Provides a stable foundation for your machine.
- Wooden dowel – Acts as the central axis for the globe.
- Mason jar lid – To fit onto the opening of the globe.
- Small wooden disc – For the dispensing mechanism.
- Paint – To customize your bubble gum machine’s appearance.
- Bubble gum – To fill your machine once it’s complete.
Tools:
- Drill – For making holes in the wooden base and dowel.
- Screwdriver – To assemble and secure parts.
- Sandpaper – For smoothing wood surfaces.
- Paintbrushes – For applying paint.
- Hot glue gun – To attach parts firmly together.
With these materials and tools, you’re ready to start building your DIY bubble gum machine. Remember, precision and care are key to creating a functional and visually appealing bubble gum dispenser.
Step-by-Step Construction Guide
Building a DIY bubble gum machine is an enjoyable project. This guide breaks down the process into clear, manageable steps.
Step 1: Preparing the Wooden Base
Start by drilling a hole in the center of the wooden base. This hole should be the same diameter as your wooden dowel. It’s crucial for the stability of your DIY bubble gum machine.
Step 2: Attaching the Dowel
Insert the wooden dowel into the hole in the base. Use a strong adhesive or a screw to secure it. This dowel is the backbone of your DIY bubble gum machine, supporting the globe.
Step 3: Preparing the Globe
If your globe has an opening, fit the mason jar lid onto it. This step is vital for the DIY bubble gum machine’s mechanism. If the globe is sealed, carefully create an opening at the bottom to fit the lid.
Step 4: Mounting the Globe
Slide the globe over the dowel and position it on the base. Ensure it’s stable and centered. Your DIY bubble gum machine is taking shape!
Step 5: Creating the Dispensing Mechanism
Attach the small wooden disc to the dowel inside the globe. This disc should be large enough to block and release bubble gums when turned. It’s a crucial part of the DIY bubble gum machine’s functionality.
Step 6: Painting and Customizing
Paint the wooden parts of your DIY bubble gum machine. Choose colors that match your style or the room’s décor. Let your creativity shine in this step.
Step 7: Filling with Bubble Gum
Once the paint is dry, fill the globe with bubble gum. Your DIY bubble gum machine is almost ready to use.
Step 8: Final Assembly
Check all parts of your DIY bubble gum machine for stability. Make any necessary adjustments. Your machine should be sturdy and functional.
Step 9: Enjoy Your Creation
Your DIY bubble gum machine is now ready. Enjoy dispensing bubble gum and showcasing your handiwork.
Remember, precision and patience are key. Take your time with each step to ensure the best results for your DIY bubble gum machine.
Customizing Your Bubble Gum Machine
Adding personal touches to your DIY bubble gum machine makes it uniquely yours. This section provides creative ideas to help you customize your machine. Whether you want a classic look or a modern twist, these suggestions will inspire you.
Choose Your Colors
The color scheme of your DIY bubble gum machine plays a vital role in its overall appeal. Paint is an excellent way to infuse your personality into this project. When choosing colors, think about what resonates with you and the setting where the machine will be placed.
Matching Room Decor
If your DIY bubble gum machine will be a part of your home decor, consider the existing color palette of the room. Harmonizing your machine’s colors with your room can create a cohesive look. For instance, a machine with earth tones can complement a room with a nature-inspired theme.
Expressing Personality
Your choice of color can be a direct reflection of your personality. Are you someone who loves bold and vibrant colors? Opt for bright reds, blues, or greens. Prefer something more subdued? Soft pinks, light blues, and gentle yellows offer a calmer aesthetic.
Vintage vs. Modern
For a vintage feel, pastel shades like mint green, soft pink, or baby blue can create a nostalgic look. These colors are perfect for a machine that has a retro design. On the other hand, if you’re aiming for a more contemporary appearance, choose bold and bright colors. Vivid oranges, striking purples, or electric blues can make your DIY bubble gum machine pop and stand out.
Themed Colors
Consider themed colors if your DIY bubble gum machine is part of a collection or specific room theme. For a nautical theme, navy blue and white work well. A machine destined for a child’s room might include playful and bright primary colors.
Remember, the colors you choose for your DIY bubble gum machine can transform it from a simple dispenser to a striking piece of art. Your machine isn’t just a functional item; it’s a canvas for your creativity.
Add Decorative Elements
Enhancing your DIY bubble gum machine with decorative elements can turn it into a standout piece. These additions not only personalize the machine but also elevate its aesthetic appeal.
Stickers and Decals
Stickers and decals are an easy yet effective way to decorate your bubble gum machine. They come in various designs, from geometric patterns to floral motifs. Choose stickers that resonate with your style. For a more temporary or changeable design, decals are perfect as they can be easily removed or replaced.
Hand-Painted Designs
If you’re artistically inclined, hand-painting your DIY bubble gum machine can be incredibly rewarding. You could paint intricate patterns, landscapes, or even abstract art. This approach allows for complete customization. Whether you paint a simple border or an elaborate scene, your hand-painted machine becomes a unique piece of art.
Theme-Based Decorations
Choosing a theme can guide your decoration process. A retro-themed machine could feature polka dots or classic car designs. For a space theme, paint stars, planets, and galaxies. Nature themes can include flowers, leaves, or animal motifs. Themed machines are especially great as gifts or for use in themed rooms.
Texture and Embellishments
Adding texture can bring a new dimension to your machine. Techniques like decoupage or applying fabric can create interesting tactile surfaces. Embellishments like rhinestones, beads, or even small figurines can be glued to the machine for a 3D effect. These elements can make your DIY bubble gum machine look more luxurious and detailed.
Personalization
Personalizing your machine with your name, initials, or a special date can make it even more special. This can be done with paint, stickers, or engraving. It’s a great way to commemorate an event or make the machine uniquely yours.
Remember, the key to adding decorative elements is to express your creativity and have fun. Your DIY bubble gum machine is not just a functional item but a reflection of your personal style and artistic flair.
Experiment with Materials
Diversifying the materials used in your DIY bubble gum machine can drastically alter its look and functionality. While traditional machines often feature glass globes, exploring other materials can lead to exciting and unique results.
Plastic Globes
For a more durable and child-friendly option, consider using a plastic globe. Plastic is less prone to breakage, making it ideal for environments with active kids. It’s also lighter, which can be practical for wall-mounted or portable designs. You can find clear plastic that mimics the look of glass or go for colored or frosted plastic for a different aesthetic.
Metal Components
Incorporating metal parts can give your DIY bubble gum machine an industrial or vintage feel. Using metal for the base or the dispensing mechanism can also increase the machine’s durability. Metals like aluminum, brass, or even wrought iron can be used, depending on the desired look. For a rustic appearance, aged or patinated metals are excellent choices.
Wooden Elements
Wood offers a classic and warm appearance. You can use wood not only for the base but also for the globe if you’re aiming for an entirely wooden bubble gum machine. Different wood types, from pine to oak, offer various colors and grain patterns. Wooden machines can be carved, etched, or burnt for decorative effects, lending a handcrafted charm to your project.
Recycled and Upcycled Materials
For an eco-friendly approach, consider using recycled or upcycled materials. Old jars, containers, or even repurposed light fixtures can become parts of your bubble gum machine. This not only reduces waste but also adds a unique story to your creation.
Combining Materials
Mixing materials can create interesting contrasts and textures. Combining wood and metal can offer a balance between rustic and industrial. Glass and plastic can be mixed for varying transparency and durability. The key is to find a balance that works aesthetically while ensuring the machine remains functional.
Experimenting with different materials in your DIY bubble gum machine project allows for innovation and personalization. Each material brings its unique qualities and challenges, offering endless possibilities for creativity and design.
Incorporate Lighting
Adding lighting to your DIY bubble gum machine can elevate its appeal and functionality. This feature not only enhances its appearance but also adds a playful and dynamic aspect, especially in low-light environments.
Choosing the Right Lights
LED lights are an excellent choice for this project. They are energy-efficient, emit less heat, and come in various colors. You can opt for single-color LEDs for a consistent look or multi-colored ones for a more festive effect. Battery-operated LED strings are convenient as they don’t require a power outlet.
Installation Inside the Globe
Installing lights inside the globe can create a beautiful glow that highlights the bubble gums. This can be particularly striking with clear globes. The light reflecting off the colorful bubble gums creates a delightful visual effect. Ensure the lights are securely fastened and the wiring, if any, is neatly tucked away to maintain the aesthetic appeal.
Exterior Lighting Options
You can also consider placing lights around the base or the top of your bubble gum machine. This creates a halo effect, adding depth and dimension to your machine. If you’ve used transparent materials, the light can create interesting shadows and patterns on the surface it stands on.
Interactive Lighting
For a more interactive experience, consider adding lights that activate when the machine is used. This can be achieved with motion sensors or simple mechanical switches. Imagine the lights flickering or changing colors as bubble gum is dispensed – it adds a fun, magical element to the machine.
Safety Considerations
When incorporating lighting, it’s crucial to consider safety. Ensure all electrical components are properly insulated and secure. If you’re not experienced with electrical work, consult with someone who is, or opt for battery-operated lights that are easy and safe to install.
Incorporating lighting into your DIY bubble gum machine not only makes it a functional piece but also an artistic one, especially during the night. This addition can transform your bubble gum machine from a simple dispenser to a captivating centerpiece in any room.
Your DIY bubble gum machine is more than a fun project. It’s a chance to express your creativity. So, let your imagination run wild and create a machine that truly stands out.
Maintenance and Care
Keeping your DIY bubble gum machine in great condition ensures its longevity and functionality. Regular maintenance and proper care are essential. Here’s how to keep your machine looking and working its best.
Regular Cleaning
Clean the globe regularly to keep it clear and shiny. For glass or plastic globes, use a soft cloth and a mild cleaner. Avoid abrasive materials that can scratch the surface. If your machine has metal parts, wipe them down with a dry cloth to prevent rust or tarnish.
Refilling Bubble Gum
Refill your machine with fresh bubble gum as needed. Ensure your hands are clean to avoid smudging the globe. If the bubble gum sticks or clumps together, it might be time to replace it with a fresh batch.
Check Moving Parts
Periodically check the dispensing mechanism. If it sticks or becomes hard to turn, it may need a light lubricant or adjustment. Be careful not to over-lubricate, as this can attract dirt and gum up the mechanism.
Paint and Decor Maintenance
If your bubble gum machine is painted or decorated, check for chips or wear. A quick touch-up can keep it looking new. If you’ve used stickers or decals, ensure they’re still firmly attached.
Safe Placement
Place your machine in a location where it’s less likely to be knocked over or damaged. If it’s in a high-traffic area, ensure it’s securely positioned to avoid accidents.
Climate Considerations
Keep your bubble gum machine away from extreme temperatures and direct sunlight. These can cause materials to warp, fade, or degrade over time.
By following these maintenance and care tips, your DIY bubble gum machine will remain a delightful and functional piece for years to come. Regular care not only preserves its appearance but also ensures it operates smoothly every time you use it.
FAQ on Building Your DIY Bubble Gum Machine
How difficult is it to make a DIY bubble gum machine?
Building a DIY bubble gum machine is a moderately easy project. It requires basic crafting skills and tools. With clear instructions and patience, even beginners can create a successful machine.
Can I use any type of paint for my bubble gum machine?
It’s best to use non-toxic, water-based acrylic paint, especially if the machine will be in a child’s room or in regular contact with food items like bubble gum.
How often should I clean my DIY bubble gum machine?
Clean the globe at least once a month or more often if it gets smudged or dusty. Regular cleaning maintains its appearance and hygiene.
Is it safe to put a DIY bubble gum machine in a child’s room?
Yes, if you use a plastic globe instead of glass and ensure all small and movable parts are securely attached. Always supervise young children when they use the machine.
What kind of maintenance does the dispensing mechanism need?
Check the mechanism regularly for smooth operation. If it becomes stiff, a light application of a food-safe lubricant can help. Ensure it’s clean and free of gum residue.
Can I use materials other than wood for the base and dowel?
Absolutely. Feel free to experiment with different materials like metal, sturdy plastics, or recycled materials to suit your style and needs.
Where can I find the materials to build a bubble gum machine?
Most of the materials can be found at local craft stores, hardware shops, or online retailers. Recycled materials from around your home can also be a great option.
Conclusion
Building a DIY bubble gum machine is a delightful project that blends creativity with functionality. This guide provides the necessary steps, tips, and inspiration to help you create a unique and personal machine.
If you liked these ideas, you will also like viewing these Valentines Emoji Craft.


