Last Updated on June 26, 2024 by Team Ideas24
Feeling crafty? Here’s a little DIY decor project with doilies you can try!
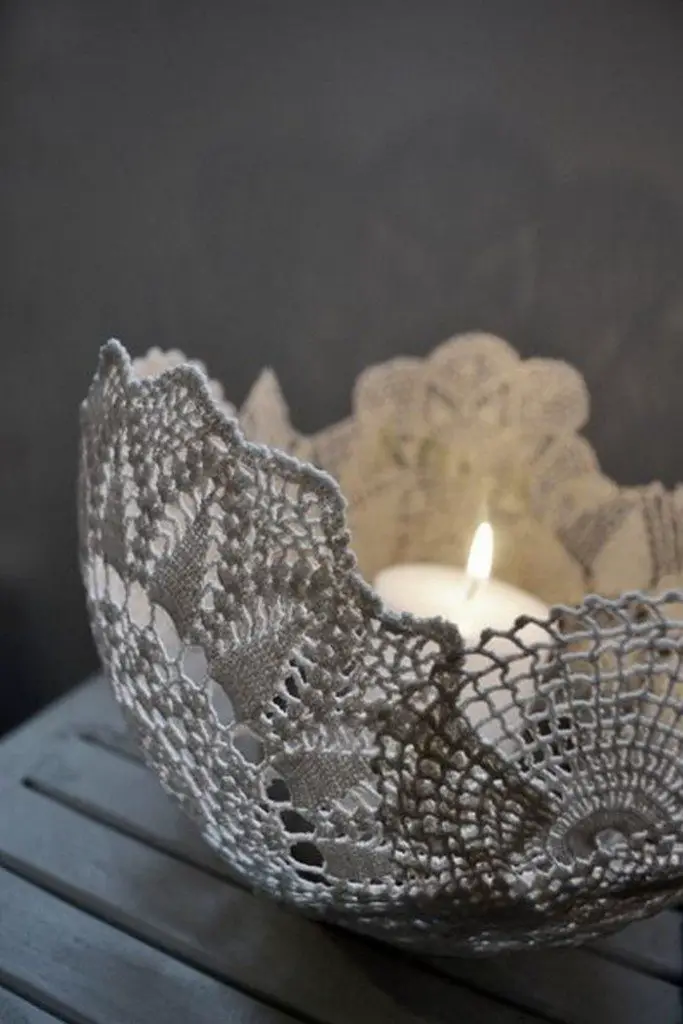
A cement lace bowl is a small, delicate bowl excellent for holding small items such as keys, earrings, and small trinkets. You can always buy them from a specialty store, but why spend good money on something you can make at home for much less?
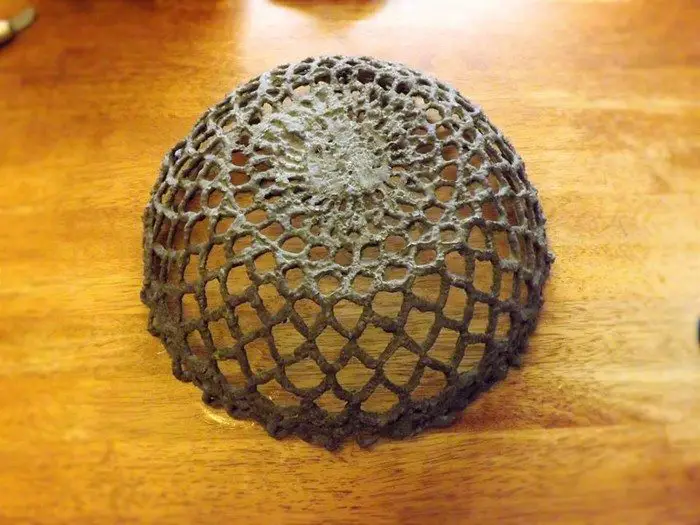
Some of you may already have a few lace doily bowls at home right now. But instead of using starch and other fabric stiffeners, this DIY project is done with Portland cement. The result is an equally beautiful yet stronger and more permanent lace bowl!
You can re-purpose old doilies if you have some. Otherwise, you can buy them from thrift stores or yard sales. If you’re feeling extra crafty and you know how to crochet, why not make your own? That should give you more freedom with the design. :)
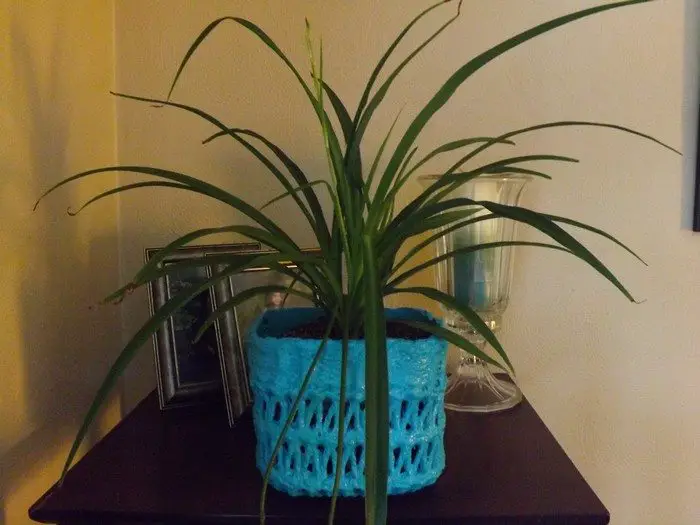
Do this little cement project to make some decorative accessories, planters, or candle holders. And when you’ve got a hold of it, you can try other materials to create a cement bowl/planter. Maybe an old drape or extra fabric you have from a previous project?
Contents
Making a Cement Lace Bowl
Materials
- Cotton Doilies
- Concrete Bonding Additive
- Portland Cement
- Water
- Plastic Sheet
- Canola Oil Spray
- Long Gloves, Dust Mask, Safety Glasses
- 2-in-1 Spray Paint with Primer
Tools
- Plastic Container (as your measuring tool)
- Fine Sieve
- Paintbrush
- Plastic Mold

Instructions
1. Gather the materials
To avoid a big mess. Make sure to lay all your materials on a particular working area, a wide plastic or carton will do.
2. Prepare your containers
You can choose between wood or plastic, this will determine what shape would you like for your cement bowl. Lay down these containers and spray with a mold release or a canola cooking spray.
3. Add the cement
In your mixing tub, sift your portland cement used in 5 parts into your measuring container with your sieve. Make sure there are no lumps and remove any hard lumps. To make a fine powder.
4. Add concrete bonding additive
Add the concrete bonding additive to the mixing tub and mix well.
5. Add water
Add water to the mixing tub and mix. If still dry, add enough water to make it look like thick mud or pudding.
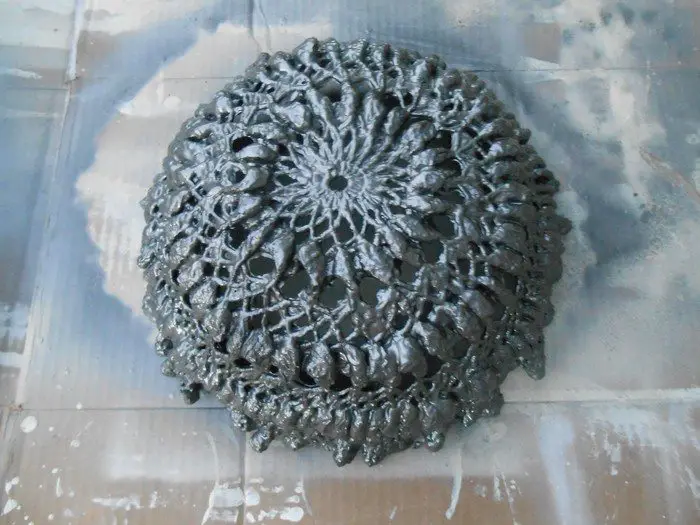
6. Add the lace
Place the lace on top of the cement, enough to cover it all with cement.
7. Transfer the lace
After covering it with cement, you can now place it in the container. Try to clean it by wiping off the excess cement.
8. Let it dry
It takes about 10 to 12 hours to harden the mixture.
9. Let it cure
When they are hard enough, you can now cover them with plastic. Let it sit for about 1 week to make sure it’s sturdy enough and will not crack.
10. Remove the plastic
After 1 week, you can now gently remove the plastic, do not force or it may crack. Then let it dry again for two or more weeks. A cement surface that hasn’t dried thoroughly will fail to adhere to sealant and/or paint, causing them to peel off prematurely.
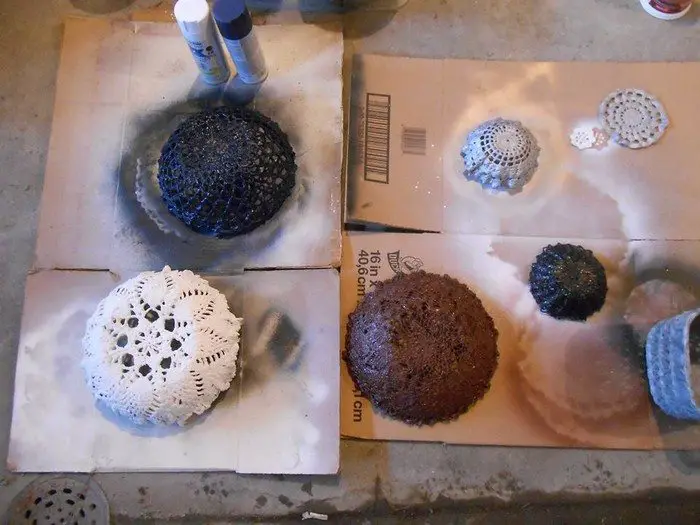
11. Paint your cement lace bowl
After a few weeks of drying, you can now paint your cement lace bowl.
12. Ready to display
After painting. Let it dry. Now you can display this anywhere in your house.
Enjoy crafting!
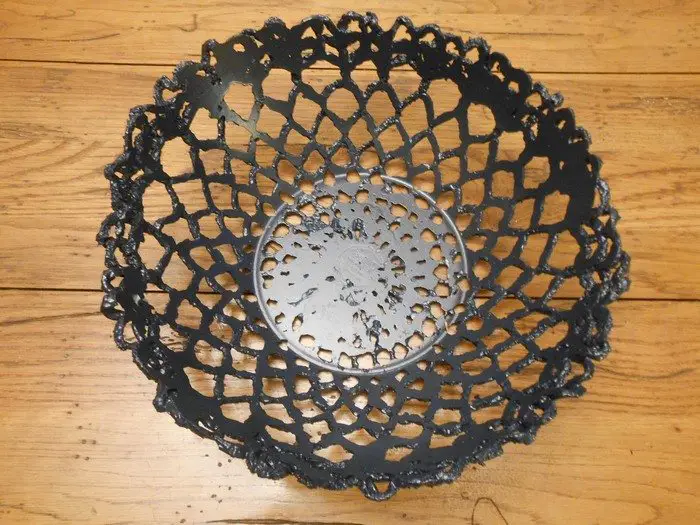
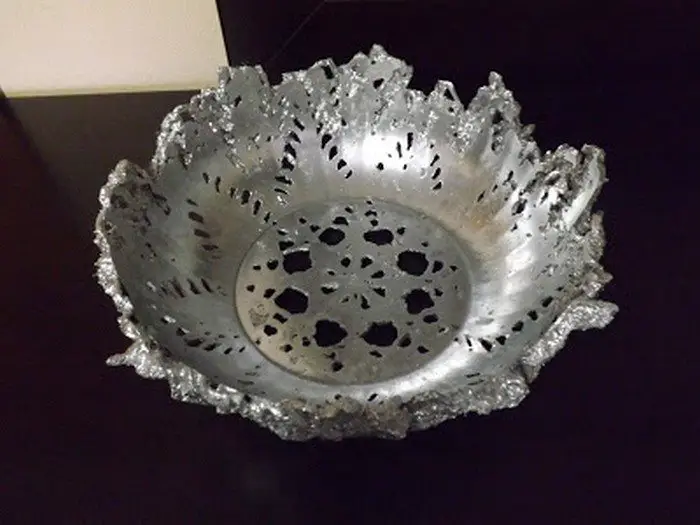
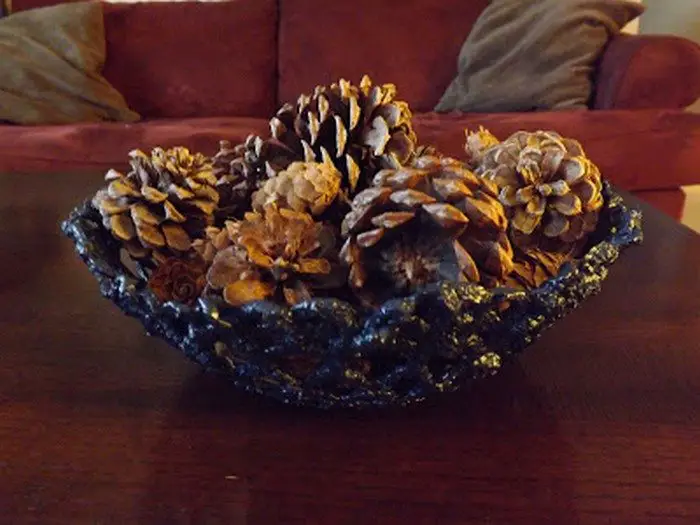
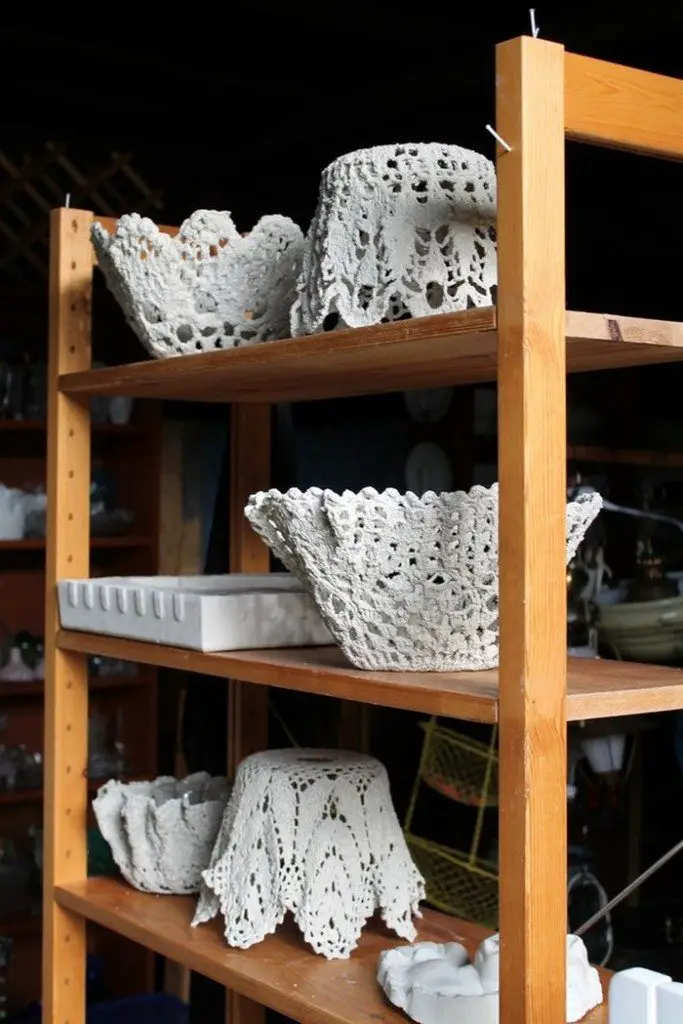
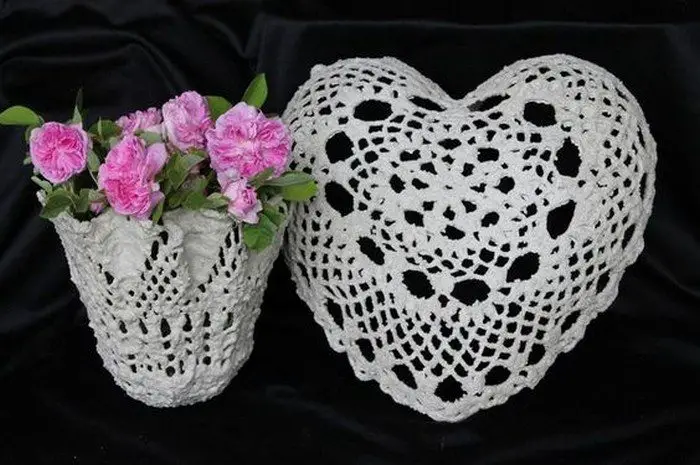
See our album of cement lace bowls for inspiration!
Click on any image to start the lightbox display. Use your Esc key to close the lightbox.
Thanks to Sprouts and Stuff for this great project. You can get further details here…
Creative Uses for Cement Lace Bowls
Cement lace bowls are versatile and stylish additions to any home. They offer both functionality and aesthetic appeal. Here are some creative ways to use these beautiful bowls.
Planters for Succulents
Transform your cement lace bowl into a charming planter for succulents. The sturdy nature of the cement makes it perfect for housing small plants. Succulents thrive in well-draining containers, and the unique texture of the lace adds an artistic touch to your greenery display.
Candle Holders
Create a cozy atmosphere by using your cement lace bowl as a candle holder. The bowl’s intricate design will cast beautiful shadows when the candle is lit, enhancing the ambiance of any room. Opt for scented candles to add an extra layer of sensory delight.
Jewelry Organizer
Keep your jewelry organized and easily accessible. Place your cement lace bowl on your dresser or vanity to hold rings, earrings, and bracelets. Its sturdy build ensures your precious items are stored safely, while its elegant design adds a touch of sophistication to your space.
Table Centerpiece
Use a cement lace bowl as a centerpiece for your dining or coffee table. Fill it with decorative items like potpourri, dried flowers, or seasonal ornaments. This adds a personal and stylish touch to your home decor, making it a conversation starter.
Key Holder
Place your cement lace bowl near the entrance of your home to serve as a key holder. It’s a practical and stylish way to ensure you never misplace your keys again. The bowl’s durability makes it perfect for everyday use.
By exploring these creative uses, you can fully appreciate the versatility of your cement lace bowl. Each use enhances its functionality while showcasing its unique beauty.
Customizing Your Cement Lace Bowl
Creating a cement lace bowl is a fun and rewarding DIY project. Customizing your bowl allows you to add a personal touch and make it uniquely yours.
Here’s a guide on how to tailor your cement lace bowl to suit your style and needs.
Choosing the Right Lace
The lace you choose will significantly impact the final look of your cement lace bowl. Different lace patterns can create various textures and designs. You can use vintage lace doilies for a classic and intricate look or modern geometric lace for a contemporary feel. If you’re feeling crafty, you can even crochet your lace to achieve a custom design that reflects your personal style.
Selecting the Shape and Size
The shape and size of your cement lace bowl can be customized by choosing different molds. You can use bowls, plates, or any container that can hold the shape of the lace as the cement sets. For a deeper bowl, select a mold with higher sides. For a shallow dish, a wide, flat mold works best. The mold you choose will determine the overall form of your cement lace bowl, so think about where and how you plan to use it.
Adding Color
Adding color to your cement lace bowl can enhance its aesthetic appeal. You can mix cement dye into the wet cement to create a colored bowl. These dyes come in various shades, allowing you to match the bowl with your home decor. Alternatively, you can paint the bowl after it has cured. Use acrylic or outdoor paint for a durable finish. Metallic paints can give your bowl a luxurious look, while pastel colors can create a softer, more subtle effect.
Embellishments and Decorations
Once your cement lace bowl is complete, you can further customize it with embellishments. Consider adding decorative elements like beads, sequins, or rhinestones to the lace before applying the cement. This will embed the decorations into the bowl, creating a unique texture and sparkle. You can also glue decorations onto the finished bowl for added detail.
Experimenting with Different Materials
While lace is the traditional material for this project, you can experiment with other fabrics to create different textures and patterns. Old drapes, netting, or even tulle can be used to make your cement lace bowl. Each material will produce a unique effect, allowing you to create a variety of custom bowls. Just ensure the fabric you choose is sturdy enough to hold the cement without collapsing.
Using Stencils and Patterns
For a more intricate design, you can use stencils or patterns on your cement lace bowl. Place a stencil over the lace before applying the cement to create a raised design. This technique can be used to add monograms, floral patterns, or abstract designs to your bowl. Once the cement has set, carefully remove the stencil to reveal the detailed pattern.
Sealing and Finishing
To ensure your cement lace bowl lasts, it’s important to seal and finish it properly. Use a clear sealant to protect the cement from moisture and stains. This is especially important if you plan to use the bowl as a planter or in a humid environment. Apply the sealant in thin, even coats, allowing each coat to dry before applying the next. This will give your bowl a smooth, glossy finish and enhance its durability.
Personalizing with Initials or Messages
Adding initials, names, or messages to your cement lace bowl can make it a meaningful gift or keepsake. You can carve letters into the wet cement before it sets, or use paint or decals to add text to the finished bowl. Personalizing your bowl in this way can commemorate a special occasion or simply add a personal touch to your home decor.
Creating Sets and Collections
Consider making a set of customized cement lace bowls in different sizes and colors. A collection of bowls can be used as a cohesive display or given as a thoughtful, handmade gift set. Each bowl can be customized to complement the others, creating a beautiful and functional ensemble.
Practical Tips for Customization
- Plan Ahead: Decide on your design and gather all necessary materials before starting your project.
- Test First: If you’re trying a new technique, test it on a small piece of fabric or a scrap piece of cement to ensure you’re happy with the result.
- Patience is Key: Allow sufficient drying and curing time to ensure your bowl is strong and durable.
By following these tips and exploring different customization options, you can create a cement lace bowl that is truly unique. Enjoy the process of making and personalizing your bowl, and let your creativity shine through every detail.
Conclusion
Creating a cement lace bowl is a delightful DIY project that combines creativity with craftsmanship. Customizing your bowl allows you to add a personal touch, making it a unique piece of decor. Enjoy the process and take pride in the beautiful and functional art you have crafted.
If you liked this project, you might also like to view DIY Concrete Coasters…